
Have you ever dreamed of making a Dreamcast game? If you are reading this probably the answer is yes. Just like you, I’ve always had this dream, but where do I start?
There are many questions and unfortunately the answers are hidden over the internet in obscure forums and sometimes in posts with more than 10 or even 15 years. As soon as you find the answers then it starts the real disaster, it all boils down to a bunch of scripts that you need to run on linux and nothing is visual.
After a long time insisting, when I finally got something running on the Dreamcast I realized that the whole process was very manual so I started to build small tools to make my life easier. Until I decided to put everything together and then was born the Titan IDE.
But what is Titan IDE and what does it do?
Titan IDE is nothing more than a tool for editing levels, drawing graphics for VMU and making spritesheets for Dreamcast.
Okay. But what about the code?
This interface called Titan IDE was made to work together with 2D game templates that come with the tool.
What is possible to do with Titan IDE?
With the Titan IDE, it’s possible to create 2D platform adventure games like Mario and Sonic or action like Mega Man and Metroid. It is also possible to create vertical and horizontal ShumUp and RPG.
Will it be possible to make games of other styles in the future? Does the engine use the potential of the Dreamcast?
This is only the version 0.9 of the tool, new updates will come every month, new templates will be added. It’s still far from using the full potential of the console, but the goal is always to get more of Dreamcast with each new update.
So enough of talking we’ll learn how to install the Titan IDE and compile your first game for the Sega Dreamcast.
Downloading files
Before starting it’s important to remember that all tests were done using Windows 10, all the settings and links available here will be compatible with this version of the Windows.
- Upgrade your DirectX to run the Dreamcast emulator
(https://www.microsoft.com/en-US/download/details.aspx?id=35)
- Install the appropriate .NET version for your windows (https://www.microsoft.com/en-US/download/details.aspx?id=49981)
- Download the EXE Titan_IDE_0_9.exe
Installing the editor
- Stop your anti-virus (Unfortunately the Anti-virus always stops the installation)
- Run the file Titan_IDE_0_9.exe
- Click on Accept
- Click on Extract
All done! You now have everything set up to make your Dreamcast games.
Using the Titan IDE
You already have everything ready to use the editor but to make our work easier.
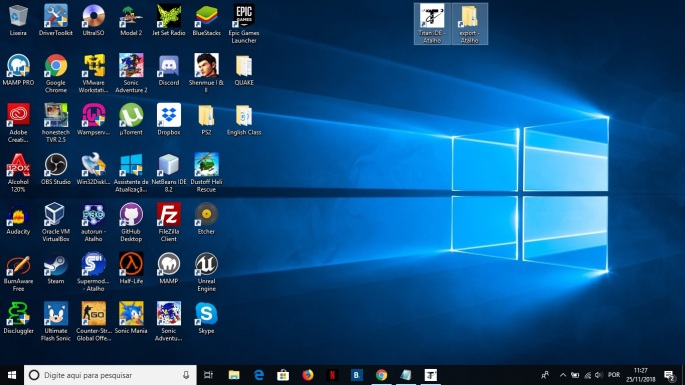
- Right-click on the desktop, New, Shortcut, put the following path in the field: C:\cygwin\Titan IDE\export.
- Click Finish.
Your desktop will have the folder export and the icon Titan IDE. This will make easier to handle the files.
Now it’s time to start producing:
- Click on the Titan IDE icon and run it.
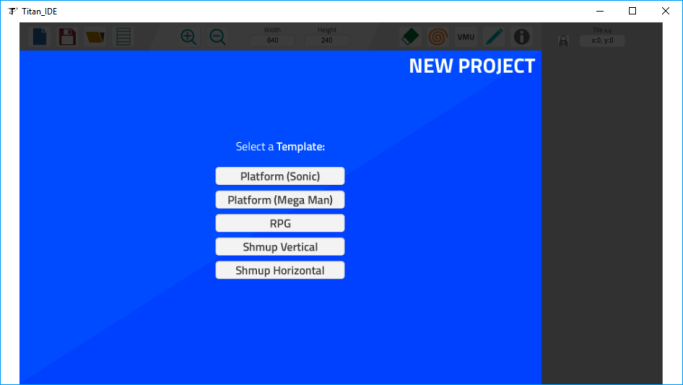
- The engine window will open and you should select the desired template.
- Select Platform (Sonic) for this introduction.
Editing the template and making your game
Now let’s edit this template to make your game.
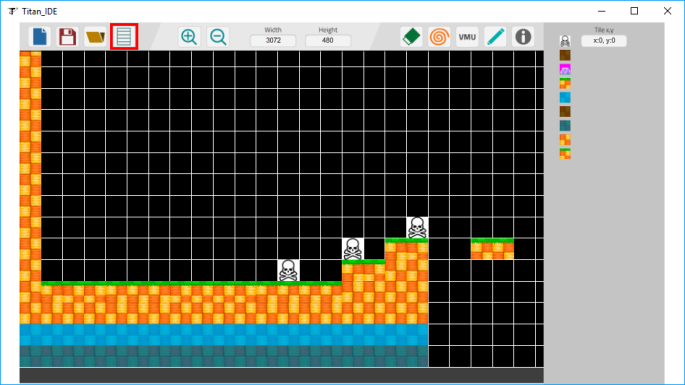
- The template map will open, we will edit this map. Drag a few pieces onto the scene, if you miss something click on the eraser and erase the tile, then click on the eraser again to stop using the eraser.
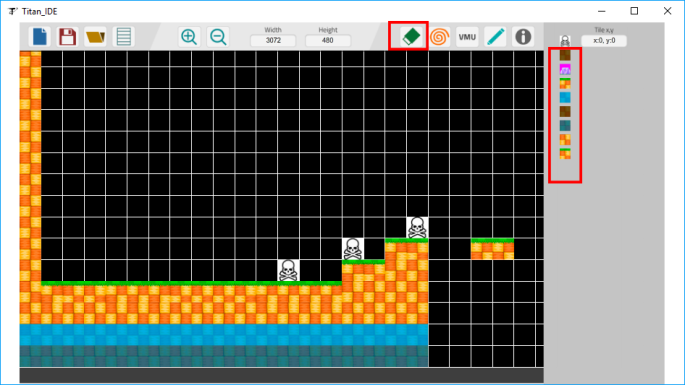
- Let’s put more enemies on the scene, drag the skull from the side of the pieces to the scene
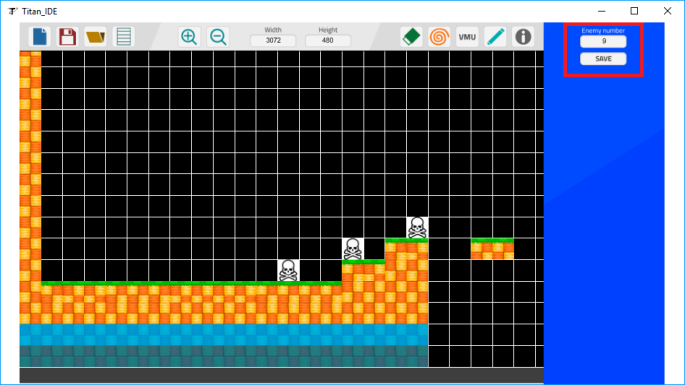
- I created 2 types of enemies for this template, if you want to change them, right click on the desired enemy on the map, a side menu will open, if you want the enemy 1 place 1 in the field, if you want the enemy 2 put 2 in the field and then click on save.

- Time to save the changes on the map, click the save button at the top of the editor, save the 2 files in the default directory, please do not change, there is a bug that I will fix soon. Replace both files.

- So what about editing the drawing that appears on the VMU? Click the VMU icon at the top of the editor.
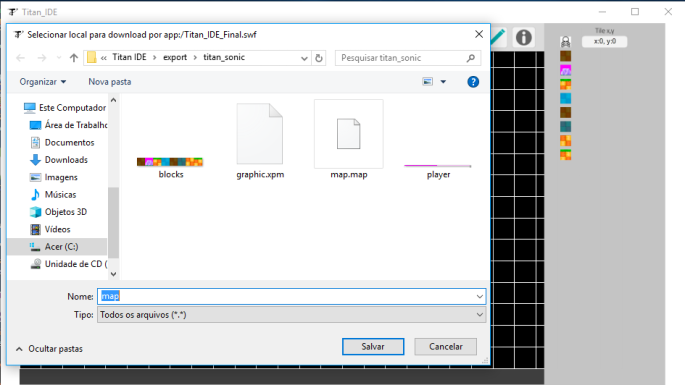
- The screen to draw on the VMU will open, click on the points to draw and click again to delete. Draw something cool and click save. Again, do not change the default directory. Replace the file.


Let’s see if the changes worked? In your desktop go to the folder export\titan_sonic, copy the file graphic.xpm to the folder C:\cygwin\home\(your_user_name)\dc\kos\Projects\titan_sonic and replace it. go back to the folder export\titan_sonic, copy the file map.map to the folder C:\cygwin\home\(your_user_name)\dc\kos\Projects\titan_sonic\romdisk\map and replace the file.
- Back to the tool’s screen, click on the Dreamcast icon.
- Click build and wait for the process to finish on the command prompt.
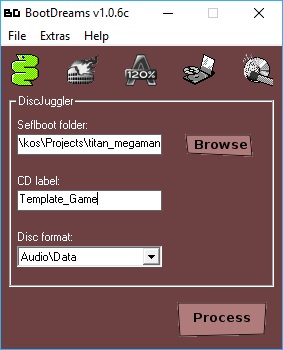
- Close the command prompt and click Create CDI.
- In the bootdreams screen, place the template directory path in the first field (C:\cygwin\home\(your_user_name)\dc\kos\Projects\titan_sonic).
- Put the name of your game in the second field.
- Click process, select an easy path to remember, and save the image.
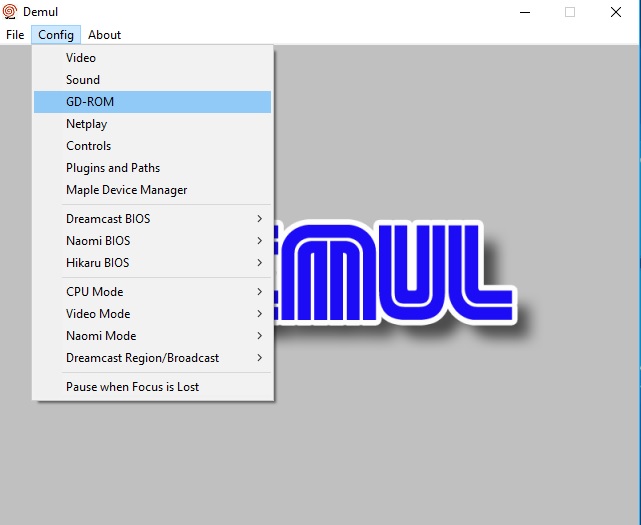
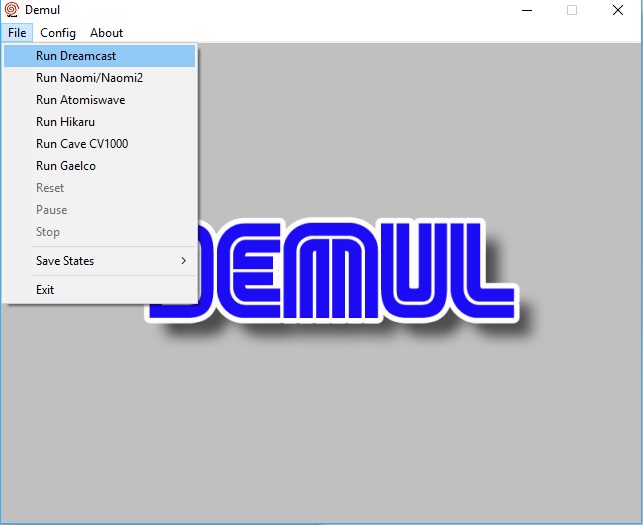
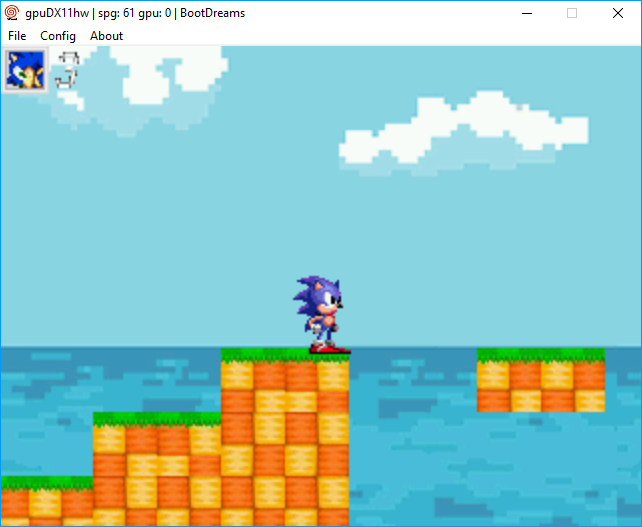
- Back on the Dreamcast Menu, click the emulator button.
- Inside the emulator select the image you generated.
- Run and test the game.

Customizing the sprites
Now you should be wondering, how do I change the sprites to make the game with your art, right? lets check it.
- Inside the C:\cygwin\Titan IDE\images folder are all the images for the scenario, create your own art and replace the current ones using always numerical order.
- For the character go to the folder C:\cygwin\Titan IDE\character_images and do the same and replace the current ones always using numerical order.
- Close and open the editor. Your images should appear in the place of the old ones. Create your map reminding yourself that the width and height of the scenery always have to be multiples of 32.

Creating the spritesheet for the character
- To create your character’s spritesheet click on the editor’s button.

- Just click on the order of the sprites, if you make a mistake double click on it and it will return to the top.
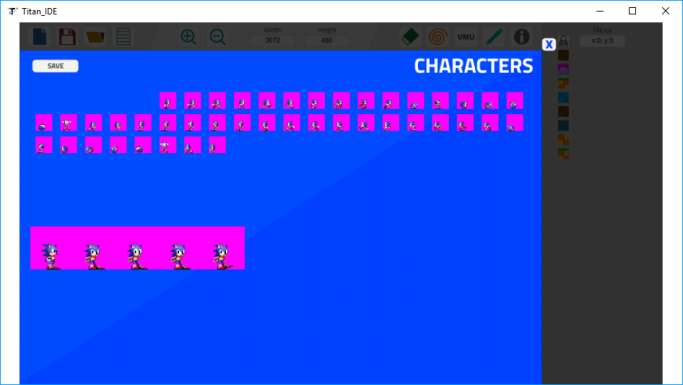
- Click save and again do not change the default directory.
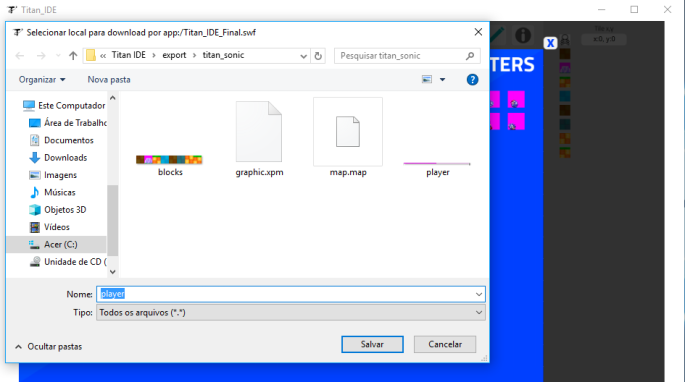
- Now it’s time to import the new sprites, open the folder export\titan_sonic on your Desktop.
- copy the file blocks.bmp to
C:\cygwin\home\(your_user_name)\dc\kos\Projects\titan_sonic\romdisk\images\blocks
- And the file player.bmp to
C:\cygwin\home\(your_user_name)\dc\kos\Projects\titan_sonic\romdisk\images\player
Changing the BackGround and other images
In case you want to change the background, the process is very similar to the stage one. Press the key “F1” on your keyboard and the background editor will open:

Inside the folder C:\cygwin\Titan IDE\BG_Editor.app\images you can find the images which can be replaced (Remember the images need to be 32×32).
The size of the background needs to be the same as you put for the stage, then all the stage will be covered by the background.
After editing the background, save it on the standard folder and inside the folder C:\cygwin\Titan IDE\BG_Editor.app\export get the file C:\cygwin\Titan IDE\BG_Editor.app\export\mapBG.map and paste it inside the folder romdisk/map of your template and copy the file C:\cygwin\Titan IDE\BG_Editor.app\export\blocks.bmp to the folder romdisk/images/BG .
Compile and generate the CDI and test it on the emulator to see the new Background.
Changing other images
In case you want to change the menu image and others, go to the folder C:\cygwin\home\(your_user_name)\dc\kos\Projects\titan_sonic\romdisk\images\BG and change the images remembering to always use bmp 16-bits.
Now that you have placed your images, go to the Dreamcast menu, compile, create the cdi and test in the emulator if everything is working.
Changing the template code
If you want to edit the template code, click on the code button in the editor.
- The editor will open notepad ++, in file-> open the folder C:\cygwin\home\(your_user_name)\dc\kos\Projects\titan_sonic. Inside this folder are all the game scripts written in C ++ full of comments. (In the future I’ll do some tutorials on how to change this template)
Testing on the console
- Done all this burn the CDI using ALCOHOL 120% or ImgBurn.
Exporting your game to the PC.
- To export the game to PC click the Dreamcast button;
- Click compiler;
Once the game is compiled for the Dreamcast enter the following commands in the DOS window:
- cd ..
- cd titan_sonic_pc
- g++ *.cpp -lSDL -lSDL_mixer
Done, the EXE of your game will be in the folder C:\cygwin\home\(your_user_name)\dc\kos\Projects\titan_sonic_pc along with all PC version codes.
Converting images to PVR:
Click here to see the tutorial.
Exporting to Nintendo Wii:
Click here to see the tutorial.
Conclusion
So that’s it folks, I hope you enjoyed it and I hope you make new games for our beloved Dreamcast. Remember to register in our forum, keep the tool always updated and be sure to follow our pages to always get the improvements of the tool and also new tutorials.
See you.

Este trabalho está licenciado com uma Licença Creative Commons – Atribuição 4.0 Internacional.

Titan_IDE_Editor não instala nem a pau aqui, windows 10 64bits, directx atualizado Framework instalado. quando executa o instalador fica uma barra de progresso como se tivesse instalando depois disso não aparece mais nada alguma ideia do que seja ?
LikeLike
Qual dos instaladores? O X86 ou o Titan Editor?
LikeLike
I’m impressed, man! Now it’s our time to create universes!
LikeLike
could you please upload it to a more reliable hoster? download always fails…
LikeLike
Hi c0deisme did you get the files?
LikeLike
i let it run over night, now i got the files
LikeLike
Good, let me know if you have any question!
LikeLike
Many thanks for a good review. I have an error opening the Titan IDE.exe file?
LikeLike
Which error do you have? do you have avast installed in your machine?
Thank you!
LikeLike
Did you get it working? Let me know if you have any problem!
LikeLike
Hi Luiz ! Really good work for your tool !
I’m a french tutorial maker who make videos on how to create videogames. My first(and best) console I have ever had is the Dreamcast. You are making my dreams come true ! :).
Would you be OK if I host a mirror (direct download or torrent) on my webserver to improve the download speed ? I’ll let you put the links in your website, not on mine, i’m not the creator of this tool ;). I just want to share my love for the Dreamcast and game development.
Regards,
Jean CHARPENTIER
LikeLike
Sure man, just send me your e-mail because I’m always updating it! So you always will have the most recent version!
LikeLike
will this run on windows 7
LikeLike
I’ve tested only on W10, but I’m almost sure it will work on any windows above XP
LikeLike
Why does the anti-virus detect this
LikeLike
Not sure, but I’m going to send a report to these companies to see if we stop getting this. Thanks for using the engine.
LikeLike
Hi Luiz!! Can the default templates be replaced with backgrounds and character art that I created?
LikeLike
Yes sgtmar, you can change all the sprites!!!
LikeLiked by 1 person
Nice — Thank you!!!
LikeLike
Hey Luiz, just downloaded Titan 0.9 — excited to give this a try. Can I replace the out-of-box template art with my own background and character art?
LikeLike
sorry you can delete this comment — I was trying to activate my WordPress account to comment, but you already replied to my original comment. Much appreciated, Luiz!!
LikeLike
will there be a linux version
LikeLike
I’m going to work on that, but time is short right now.
LikeLike
Is this still an active endeavor?
LikeLike
It’s been almost 3 years since the last update. However next year (When I’m free from my master degree) I really want to get back to work.
LikeLike
Here you can see what we achieve with it: https://www.youtube.com/watch?v=pWrFcYOkq1E
LikeLike
That’s pretty cool! I am certainly going to check it out. I was interested in making a Visual Novel with it or something, but we will see. Thanks for the reply and good luck on your degree! Those aren’t easy.
LikeLike